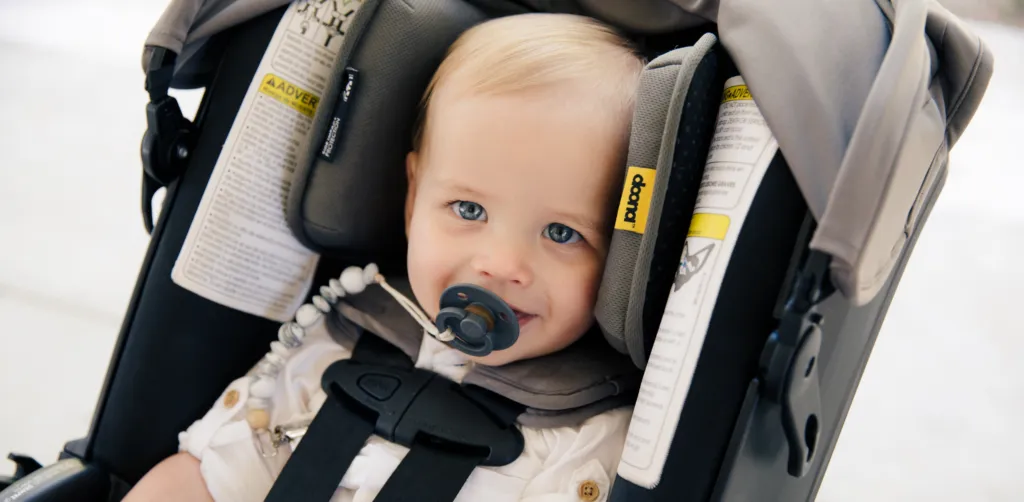

The Doona stroller is a game-changer for parents, offering the flexibility of a car seat and stroller in one sleek design. But with daily use, it can quickly pick up dirt, crumbs, spills, and stains. Keeping your Doona stroller clean not only helps maintain its appearance but also ensures it remains a safe and comfortable space for your little one.
This comprehensive guide will walk you through the best methods to clean your Doona stroller, following official care instructions from the manufacturer. We’ll also share additional tips to make the process easier and more efficient, whether you choose store-bought cleaners or want to make your own. With step-by-step videos and plenty of helpful tips, you’ll have your stroller looking like new in no time.
What You’ll Need to Clean Your Doona Stroller
Before you begin cleaning, it’s important to gather all the necessary tools and materials. Having the right products on hand will help protect the stroller’s materials and make cleaning much more efficient.
Materials:
- Mild baby-safe detergent or soap
- Warm water
- Soft brushes (toothbrush or soft-bristled brush)
- Microfiber cloths
- Vacuum with brush attachment
- Towel for drying
- Disinfectant wipes (optional for handles)
- Stain remover (either store-bought or homemade)
Why These Products Are Essential:
- Mild detergent: Harsh cleaners can irritate your baby’s skin, so stick to a mild, baby-safe detergent for cleaning fabrics.
- Homemade: We made a tutorial on how to make a baby-safe cleaning solution yourself by using ingredients you have at home. Check it out here on how to make it.
- Premade: In case you are looking for a premade solution by experts, we recommend buying baby safe product on Amazon
- Microfiber cloths: These are gentle enough to avoid scratching plastic and metal parts but effective at picking up dirt.
- Vacuum: A vacuum with a brush attachment is great for removing crumbs and dirt from crevices without having to disassemble everything.
Step 1: How to Prepare Your Doona Stroller for Cleaning
Preparation is key to making the cleaning process as smooth as possible. Before diving into the actual cleaning, follow these steps to ensure your Doona stroller is ready for a thorough clean:
- Inspect for Damages: Before you start, check your Doona stroller for any signs of damage. Look for cracks, worn parts, or any malfunction in the stroller’s mechanisms. If anything seems off, it’s best to address the damage before proceeding with cleaning.
Step 2: How to Clean Doona Stroller Fabric and Seat Inserts
The fabric components of your Doona stroller, like the seat cover, canopy, and shoulder pads, tend to get the dirtiest. Here’s how to clean them thoroughly while protecting the material:
- Machine Washing: According to Doona’s guidelines, the seat cover, arm pads, and canopy are machine washable.
- Spot Cleaning: For small stains, a quick spot clean with your homemade or store-bought stain remover will do the trick. Gently scrub the area using a soft brush or cloth, and then wipe clean with a damp cloth.
Pro Tip: Spot clean regularly to avoid the need for frequent deep cleans. The sooner you tackle a stain, the easier it is to remove.
Step 3: Removing the fabric parts for a deep clean
Removing the parts from the Doona stroller can be a bit tricky. This step-by-step guide will walk you through how to thoroughly clean your Doona stroller and car seat, from removing the fabric to wiping down the harness, and how to safely reassemble it afterward.
Step 3.1: How to Remove and Clean the Shoulder Pads from Your Doona Stroller
The first step in cleaning your Doona stroller is to remove the shoulder pads, which are often the first parts to collect dirt from everyday use.
 1")
How to do it: Unclick the small clips that attach the shoulder pads to the harness. Once you have released the clips, the pads will come off easily. This allows you to clean them separately and thoroughly.
Step 3.2: Loosen the Harness for Easier Cleaning
Before you move on to removing the harness and belts, it’s important to elongate the harness as much as possible. This gives you more flexibility to clean the seat.
How to do it: Click the plastic chest clip together to secure the harness in place. Then, gently pull the harness toward you, elongating it to its full length. This will make the cleaning process much easier. Finally, unbuckle the chest connector to release the harness fully.
Step 3.3: Disconnect the Harness from the Back of the Car Seat
The harness straps are connected to the back of the car seat and need to be disconnected before you can remove the fabric and clean the seat properly.
How to do it: Turn the car seat around so you can access the back. You’ll notice that the two harness straps are attached to a metal plate. Gently remove both sides of the harness from the metal plate to free the straps.
 2")
 3")
Step 3.4: Pull the Seatbelt Out for Cleaning
Once the harness is disconnected from the back, it’s time to remove the seatbelt. This is one of the key areas where dirt, food crumbs, and sweat can accumulate.
How to do it: With the seat in its normal position, pull the seatbelt out from the upper side of the car seat. Once the seatbelt is free, you can hang it on the sides of the seat to keep it out of the way during cleaning. Be sure to wipe down the seatbelt thoroughly with a damp cloth to remove any dirt or debris that has built up.
Step 3.6: Unhook the Fabric Seat from the Frame
The fabric seat of the Doona stroller is attached to the frame via hooks and snaps. Removing it gives you the ability to machine wash the fabric and clean it thoroughly.
How to do it: Face the back of the car seat again. At the top of the seat, you’ll find four hooks holding the fabric to the frame. Unhook all four to loosen the fabric. Then, turn the car seat around to the front and start rolling the top of the fabric seat toward you. As you do this, look for clips near the level of the sun visor—pull them up slightly to pop them out of place.
Step 3.7: Loosen the Fabric Around the Armrests and Bottom
The fabric is tightly secured around the armrests and needs to be loosened to fully remove it from the seat. This part of the stroller often collects crumbs and debris, so it’s essential to clean it well.
How to do it: Gently pull the fabric around the armrests to unhook it. Then, move down to the bottom of the seat, where you’ll find snaps that secure the fabric in place. Pull up with increasing force, and the fabric will unsnap.
Step 3.8: Unclip the Bottom of the Car Seat and Remove the Fabric Completely
Now that the top and sides of the fabric are loosened, you’ll need to focus on unclipping the bottom of the seat to fully remove the fabric.
How to do it: Turn the car seat around to face the bottom. Just above the warning stickers, you’ll find a clip securing the fabric. Apply a bit of force to snap it out. Then, carefully work the fabric free from the buckle area. Now, the fabric should be fully loosened from the base, and you can pull it off completely.
Step 4: Cleaning the fabric parts of the Doona stroller
Step 4.1: Vacuum Crevices
Once you’ve removed the fabric, use a vacuum with a brush attachment to clean out the crevices. Pay attention to areas like the seat base, where crumbs and dirt often accumulate. This step is important for ensuring you don’t leave any loose dirt behind when you start scrubbing.
Pro Tip: Compressed air is another great tool for blowing out dirt from small crevices and hard-to-reach areas.
Step 4.2: Machine Wash the Fabric (But Avoid the Dryer!)
Now that the fabric is removed and vaccumed, it’s ready to be washed. Regular washing of the fabric will help keep your Doona stroller and car seat looking fresh and free of stains.
How to do it: Place the fabric in the washing machine using cold water and a mild detergent. Make sure to select the gentle cycle to protect the fabric. Important: Never put the fabric in the dryer, as it may shrink or damage the material. Instead, air dry the fabric completely before reassembling the seat.
Step 4: Cleaning the Frame and Plastic Parts
The frame, wheels, and other plastic parts of your Doona stroller can gather a surprising amount of dirt. Follow these steps to ensure they remain clean and functional:
- Wipe Down the Frame: Using a damp microfiber cloth and a mild soap solution, gently wipe down the stroller frame, handlebars, and any exposed plastic parts. Focus on areas that are frequently touched, like the handles and the sides of the seat. Be careful not to over-saturate the cloth, especially around joints or moving parts.
- Scrub the Joints and Mechanisms: Dirt and grime can accumulate in the joints and mechanisms that allow the Doona stroller to switch between car seat and stroller modes. Use a soft toothbrush to scrub these areas carefully. This will help keep the stroller’s mechanisms moving smoothly.
- Sanitize the Handles: The handles are one of the most frequently touched parts of the stroller, so it’s important to keep them clean. After wiping them down, use disinfectant wipes to sanitize the area, especially after outings.
Pro Tip: When storing the Doona stroller for extended periods, keep it in a dry, covered area away from direct sunlight. If you frequently travel, the Doona Travel Bag is a great option for protecting the stroller and keeping it in top condition.
Step 5: Remove the Sun Visor from Your Doona Stroller
Removing the sun visor allows you to fully access the stroller’s fabric and clean it properly. If the visor is left on, it may obstruct you from effectively cleaning the surrounding areas.
How to do it: Face the back of the car seat and place your fingers underneath the top part of the sun visor. You’ll find a little clip in the middle, with two more located about two inches to each side. Gently pull these clips up to unhook the sun visor from the car seat.
Optional: If you want to fully remove the sun visor, you can unscrew the screws on both sides of the sun visor arch.
Step 6: Cleaning the Wheels
The wheels take the brunt of daily wear and tear, especially when used outdoors. Regular cleaning not only helps the wheels look better but also ensures they function properly.
- Remove Debris: Start by using a brush or your hands to remove any debris, such as small stones, leaves, or mud, from the wheel treads. This is especially important if you use the stroller on rough terrain or in wet conditions.
- Wash the Wheels: Using a soapy water solution, wipe down the wheels thoroughly with a cloth. For stuck-on dirt, a soft brush will help scrub the wheels clean without damaging them. Be sure to clean both the rubber part of the wheels and the plastic hub.
- Dry Thoroughly: After washing, dry the wheels with a towel to prevent rust from forming on any metal parts. If you notice squeaking or stiff movement, consider applying a stroller-safe lubricant to the wheel joints.
Pro Tip: Clean the wheels regularly, especially after outdoor adventures or when you notice that they’re not moving as smoothly.
Step 7: Cleaning the Base
The base of the Doona stroller is an important part to clean, as it often remains in the car or is used frequently during the transformation from stroller to car seat. It can accumulate dirt from shoes, car interiors, and general outdoor use. Here’s how to keep the base in top condition:
- Remove Loose Debris: Start by vacuuming the base to remove any dirt, crumbs, or debris that may have accumulated. Pay attention to small cracks and joints, as debris can collect there and interfere with the functionality of the base.
- Wipe the Base Down: Using a damp microfiber cloth with warm, soapy water, gently wipe down the entire base. Make sure to clean around the release buttons, latch connectors, and any moving parts.
- Dry the Base: Once wiped down, use a clean towel to dry the base completely, paying attention to any metal parts that could rust.
- Sanitize (Optional): If you’d like, use a baby-safe disinfectant to wipe down frequently touched areas like the release button or latch connectors.
Pro Tip: Use a seat protector in your car, which often comes with the Doona stroller. This will help keep the base clean and prevent damage to your car seats.
Step 8: Checking the Expiration Date
Now that you are cleaning the Doona, it’s a good time to check its expiration date. Like many other car seats and strollers, the Doona has a recommended lifespan to ensure that it remains safe and fully functional. Over time, the materials and components may wear out or degrade, which could compromise the safety features.
- Where to Find the Expiration Date: The expiration date for the Doona stroller is typically located on a label on the bottom of the car seat, near the base or on the seat shell itself. Check for the date of manufacture and the expiration date.
- Why the Expiration Date Matters: The materials used in car seats, such as plastics, can weaken over time due to temperature changes, daily use, and exposure to sunlight. By adhering to the expiration date, you ensure that the stroller is still providing the maximum level of safety for your child. Check out NHTSA’s recommendations for car seat safety.
- How Long Does the Doona Last?: The Doona is generally designed to last for approximately 6 years from the date of manufacture. Be sure to mark the expiration date in your calendar or phone as a reminder.
Pro Tip: If your Doona stroller is approaching or past its expiration date, consider replacing it with a newer model to ensure your child’s safety. Always keep an eye on wear and tear, even before reaching the expiration date, especially in heavily used strollers.
Step 9: Reassembling the Stroller
Once everything is clean and completely dry, it’s time to reassemble your Doona stroller. Follow these steps to ensure everything is securely in place and working properly:
- Double-check Components: Make sure all parts, including the seat cover, canopy, and shoulder pads, are fully dry before reassembling.
Step 9.1: Reassemble Your Doona Stroller
Once everything is clean and dry, it’s time to put your Doona stroller back together. Reassembling is as simple as reversing the steps you followed to disassemble it.
How to do it: Begin by attaching the fabric back to the frame, securing all hooks and clips. Make sure to snap the fabric back in place around the armrests and lower part of the seat. Reattach the sun visor, and ensure the seatbelt and harness are properly connected to the metal plate at the back. Finally, place the shoulder pads and secure the harness clips.
- Test the Mechanism: Once everything is reassembled, test the stroller’s car seat-to-stroller transformation mechanism to ensure it’s working smoothly. If you notice any resistance, check that no dirt has accumulated in the joints.
Frequently Asked Questions (FAQ)
Q1: Can I use regular detergent to clean my Doona stroller?
A: It’s best to avoid harsh or strong detergents when cleaning your Doona stroller, as they can irritate your baby’s skin and damage the fabric. Use a mild baby-safe detergent or soap to clean the seat cover, canopy, and other fabric components. This ensures that the stroller remains gentle on your baby’s sensitive skin.
Q2: How often should I clean my Doona stroller?
A: It’s recommended to clean your Doona stroller every 1-2 months, depending on how frequently you use it. Regular spot cleaning for small messes can also prevent the need for deep cleans. Always clean the stroller thoroughly after any major spills or outdoor trips to remove dirt, crumbs, and stains.
Q3: Can I put the Doona stroller seat cover and canopy in the dryer?
A: No, it’s best to air dry the seat cover, canopy, and other fabric components after washing. Tumble drying can cause the fabric to shrink or lose its shape. Hang the fabric to air dry in a well-ventilated area.
Q4: How do I know if my Doona stroller is still safe to use?
A: Regularly check for signs of wear and tear on your Doona stroller, including cracks in the frame, worn-out fabric, or stiff wheels. Additionally, make sure to check the expiration date located on the car seat base or the seat shell to ensure the stroller is still within its recommended lifespan of about 6 years.
Q5: What’s the best way to clean stubborn stains on the stroller fabric?
A: For stubborn stains, use a baby-safe stain remover or make your own by mixing warm water, baking soda, white vinegar, and a few drops of baby-safe liquid detergent. Apply the solution to the stain, let it sit for 5-10 minutes, and scrub gently with a soft brush.
Q6: Can I use disinfecting wipes on my Doona stroller?
A: Yes, disinfecting wipes are great for sanitizing frequently touched areas like the handles and buckles. However, be sure to use baby-safe disinfecting wipes to avoid exposing your baby to harsh chemicals.